Peanut Butter Cheesecake Cookies

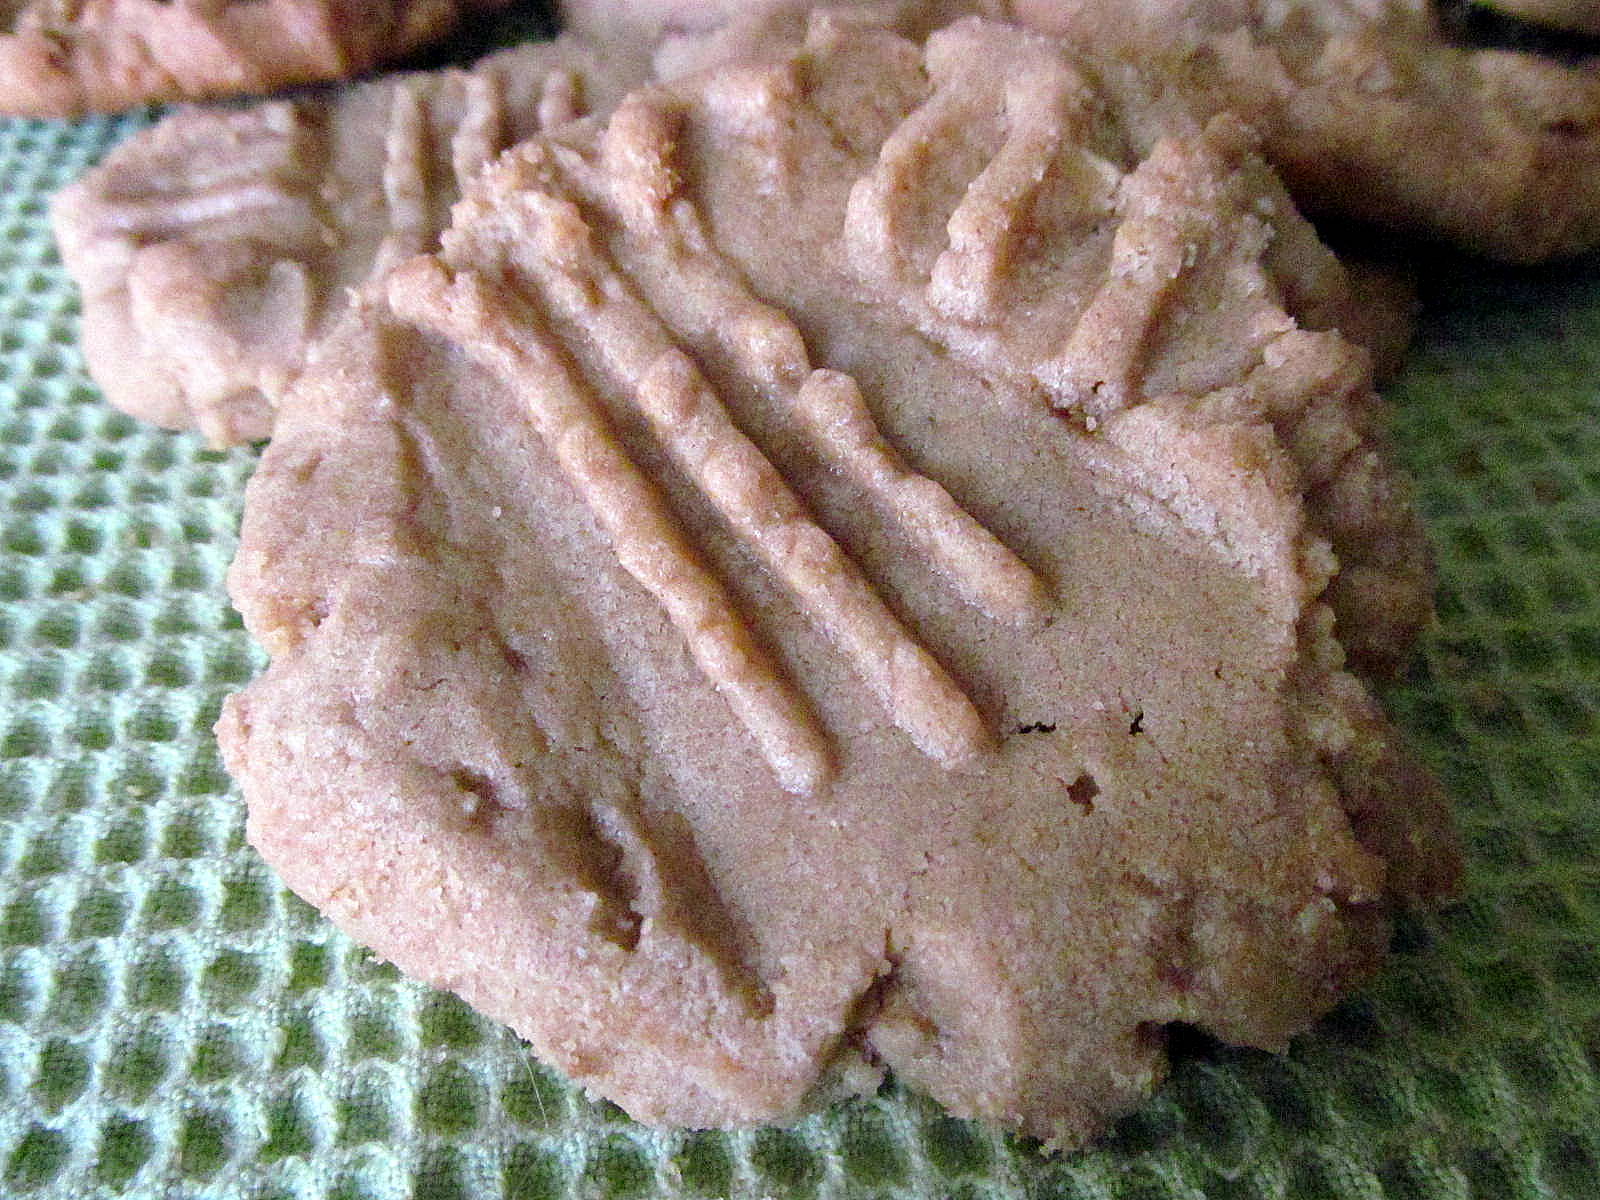
Similar to your classic Peanut Butter Cookies, these cookies are make with cheesecake instead of butter, creating a smoother, thicker, texture. 

Peanut Butter Cheesecake Cookies on pixiedustkitchen.com. These cookies use cream cheese instead of butter, adding a thicker, smoother texture.

These cookies have been a long time coming. I’ve had the idea floating around in my head for a few weeks and finally made them. It’s really a simple concept- simply substituting butter for cream cheese in your cookies to give a completely different flavor and texture. I was scared to do this for a while because I don’t know a lot about recipe development and baking science quite yet, but I got lucky and this recipe worked out on the first try!

Peanut Butter Cheesecake Cookies on pixiedustkitchen.com. These cookies use cream cheese instead of butter, adding a thicker, smoother texture.

Cream cheese adds so much to cookies, it’s wonderful- and I don’t even like cream cheese! These are the thickest and most moist cookies I have EVER made. Something I’ve learned through baking so many cookies is that you can use almost any fat in cookies. I say almost because I get the feeling that if you used oil in your cookies, you’d get a goopy, brownie like mess… which doesn’t sound too bad, does it?

These are my favorite cookies I’ve ever made. I know, I say that with every cookie post. I guess that means I just like cookies! (Or that I’m getting better at making cookies, which is also a possibility.) But I love how thick they bake up; how moist the cream cheese keeps the cookies, and how little they spread.

Peanut Butter Cheesecake Cookies on pixiedustkitchen.com. These cookies use cream cheese instead of butter, adding a thicker, smoother texture.

Because cream cheese is sweeter than butter, I reduced the sugar. Most cookie recipes I have call for 1.5 C of sugar, and I reduced that to 1 C. I kept the ratios almost the same- I wanted moist cookies that don’t spread a lot, so I added more brown sugar than white. These cookies use only 1/4 C of white sugar, which isn’t much to induce spreading. I suggest pressing down slightly with your hand before baking if you want a flatter cookie rather than a mound of a cookie.

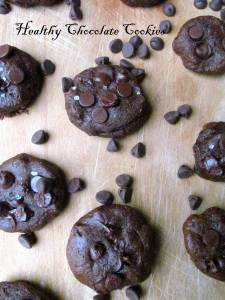
I plan on doing more baking with cream cheese… it’s not a skinny or healthy thing, but summer is my time to indulge before going back to school. So indulge with me. Treat… Yo’Self. (is that getting old yet?) Besides, cream cheese just adds soooo much to cookies! Try substituting it with my classic chocolate chip cookies, or in my s’mores cookies! Mmmm… cream cheese s’mores… I may need to make that next!

Peanut Butter Cheesecake Cookies on pixiedustkitchen.com. These cookies use cream cheese instead of butter, adding a thicker, smoother texture.

Peanut Butter Cheesecake Cookies
Source: Pixiedustkitchen.com
Ingredients

  • 8 oz (1 Cup) Cream Cheese (Full fat, not Neufchatel or low fat)
  • 3/4 C Creamy Peanut butter
  • 3/4 C Brown sugar
  • 1/4 C granulated sugar
  • 1 tsp vanilla extract
  • 2 eggs
  • 2 C all purpose flour
  • 1 tsp salt
  • 1 tsp baking soda
  1. Cream cream cheese peanut butter, sugars, and vanilla. Add in eggs one at a time.
  2. In a medium bowl, mix together flour, salt, and soda. Mix into wet ingredients.
  3. Let chill 1 hour and up to two days. Scoop 2 tbs size balls onto cookie sheets. Bake for 8-10 minutes, or until edges are golden brown. (Even if the middles look overdone, they will continue to cook and set up as they cool.) Let cool on cookie sheets for 5 minutes before transferring to a wire cooling wrack.
  4. Cookies will keep for 2 weeks. Store in an airtight container.

Related Recipes…

Death By Peanut Butter Cookies
pbsand4

Soft Baked Peanut Butter Cookies

pbcookie3

Nutella Stuffed Chocolate Cookies

I know, I know. I just did this last week. But I have a jar of Nutella begging to be used and stuffing it in cookies just seems to be the logical option. (Besides eating it with a spoon, of course!)

Nutella Stuffed Chocolate Cookies- chewy, brownie-like cookies stuffed with Nutella by Pixie Dust Kitchen


But stuffing Nutella in a cookie IS much more fun than eating it with a spoon- you get double the chocolate! This past week was VBS at my church and after spending a week wrangling 13 4-6 year olds, I think I deserve a treat. And I think you all deserve a treat as well! Let’s celebrate life, shall we? L’Chaim!

This is your basic chocolate cookie recipe, full of butter and sugar. No sneaky healthy swaps this time. They pass my chocolate cookie test- crunchy on the outside, chewy on the inside, and don’t turn into crumbly bricks on subsequent days. They’re almost like brownies!

Nutella Stuffed Chocolate Cookies- chewy, brownie-like cookies stuffed with Nutella by Pixie Dust Kitchen


And then there’s the Nutella. Oh, the Nutella. It melts into the cookie as it bakes, adding more moisture and enhancing the chocolate flavor. It will firm up after it cools, but some of it will remain melted into the cookie. It’s just some kind of wonderful.

Of course, like most cookies on my website, chilling the dough is MANDATORY, because of how sticky the dough is. It’s only an hour and a half of dough chilling though- not too much. If you don’t line you’re cookie sheets with wax or parchment paper, or a silicone baking mat, you will need to chill your dough a little longer. I decided to do a little cookie baking experiment when baking these cookies and cooked some on a silicone baking mat, some on a wax paper lined baking sheet, and some on a plain, unlined baking sheet to see which ones would bake up thicker. The verdict? There was almost no difference. Granted, I did chill the dough longer for the latter two options, but my conclusion is that there isn’t much of a difference, and if you’re not lining your baking sheet, chill your dough longer.

Nutella Stuffed Chocolate Cookies- chewy, brownie-like cookies stuffed with Nutella by Pixie Dust Kitchen


Stuffing the cookies is easy, much easier than my salted caramel stuffed cookies. Scoop out 1/2 Tbs of dough, roll it into a ball, poke a hole in the middle, and stuff. Scoop out another 1/2 tbs of dough (I just used my measuring spoon) and place on top, and roll into a ball. Hardly any extra steps than just baking plain cookies.

My taste testers loved it- Brian at it in about three bites, and my parents eat 1-2 every day. I’m guessing I’ll have to make a second batch this weekend!

Nutella Stuffed Chocolate Cookies- chewy, brownie-like cookies stuffed with Nutella by Pixie Dust Kitchen

Nutella Stuffed Chocolate Cookies
Ingredients

  • 1 C Butter, Room temperature
  • 1 C Brown Sugar
  • 1/2 C Granulated Sugar
  • 1 tsp vanilla extract
  • 1 Egg + 1 egg yolk
  • 2 C flour
  • 3/4 C chocolate powder
  • 1/2 tsp salt (may increase if not using salted butter)
  • 1 tsp baking soda
  • 1 tsp cornstarch
  • 1 Tbs milk
  • Nutella
  1. Preheat oven to 350˚F. 
  2. Cream butter, sugars, and vanilla together on medium speed. Mix in egg and egg yolk.
  3. In a medium bowl, sift together dry ingredients. Slowly mix into wet ingredients. Cover and chill for at least 1.5 hours.
  4. Scoop out 1/2 tbs mounds of cookies and poke a hole in the center. Fill with 1/4 tsp of Nutella. Cover with another 1/2 tsp mound of cookie dough and roll into a ball. Bake for 8-12 minutes or until cookies are beginning to crinkle. Let cool on cookie sheet before transferring to wire cooling rack.
  5. Makes 24 cookies.

Related Posts….

Healthy Chocolate Cookies, made with no butter or white sugar
Healthy Cocolate Cookies. No white sugar or butter. You'll never guess the secret ingredient!

S’mores Cookies
S'mores Chocolate Chip Cookies

Salted Caramel Nutella Stuffed Chocolate Chip Cookies

Meet my new favorite cookie.

Nutella Salted Caramel Stuffed Cookies

Pieces of caramel, a dollop of nutella, all stuffed in one giant, soft-baked chocolate chip cookie.

Salted Caramel Nutella Stuffed Chocolate Chip Cookies

Stuffing things in cookies is much harder than I expected it to be. The first batch of these cookies, the caramel sank to the bottom and the cookie spread out. I made the mistake of (1) using the entire piece of caramel, rather than cutting them in half, and (2) removing them from the cookie sheet while the cookie was just done and the caramel was still melted, creating a sticky mess once the cookie actually cooled.

The trick, I found, was to dip the caramel in the nutella before placing it in the cookie. We cut the caramels in half, dip them in nutella, then place them on a mound of cookie dough before adding some more to top. These cookies will seem huge, (and they are!) but they are not too big. The cookies will be bakery size cookies, and the caramel and nutella will spread out within the cookie, making an ooey, gooey, delicious treat.

nutellacaramelcookies6

Adding a sprinkle of sea salt is just the icing on the cake.

Speaking of icing, I love spreading more Nutella on top and dipping the cookies in milk.

Salted Caramel Nutella Stuffed Chocolate Chip Cookies

Recipe:

  • 2 Sticks (1 cup) butter, softened to room temperature
  • 1/2 c sugar
  • 1 c brown suger
  • 1 tsp vanilla extract
  • 2 eggs
  • 2 1/4 c flour
  • 1 tsp baking soda
  • 1 tsp salt
  • 1 tsp cornstarch
  • 1 1/2 c chocolate chips
  • 12 Caramel Creams
  • 6 tsp Nutella
  1. Cream butter, sugars, and vanilla until creamy and combined. Add eggs, one at a time. 
  2. In a separate bowl, mix flour, soda, salt, and cornstarch. Slowly add to wet ingredients. Mix in the chocolate chips. Cover and let chill for 1 hour-3 days.
  3. Unwrap caramels and cut in half. Line cookie sheet with silicone mat, wax paper, or parchment paper. Using a tablespoon size spoon, scoop rounds onto cookie sheet and make an indent with thumb. Dip caramel in nutella (about 1/4 tsp per cookie) and place another round of cookie dough on top. (A “scant” tablespoon, so to speak.)
  4. Bake at 325˚F for 10-12 minutes until edges are starting to brown. The cookies will look underdone when you pull them out of the oven, but they will continue to cook while they cool. Let cool completely before moving to cookie sheet.

These are my new favorite cookie, and I’m sure it will be yours too.

Some of my other favorite cookies…

Healthy Chocolate Cookies, with no white sugar or butter!

Healthy Cocolate Cookies. No white sugar or butter. You'll never guess the secret ingredient!

My mom’s famous chocolate chip cookies, and my go-to cookie base!

cccookies2

Healthy Chocolate Cookies

hccookies8

Yes, you read that title correctly. Healthy chocolate cookies- and they really are healthy! Let me tell you why… there is no butter. No white sugar, and only 1/2 C of brown sugar. They contain a mixture of white and whole wheat flour.

And you’ll never guess what the secret ingredients making these cookies healthy are.

Drumroll, please…

Avocados and honey!

hccookies1

I really like this up-and-coming trend of using avocados in desserts, and the other day while browsing Trader Joe’s I saw that avocados were being advertised as “natures butter.” Immediately I got the idea to substitute avocados for butter in cookies. I love cookies, and I tend to go through more butter than Paula Dean on an average week, so I’m constantly looking for ways to cut back on butter and make healthier desserts.

hccookies5

I chose to make chocolate cookies because I’m not a huge fan of avocados, and I wanted to mask the flavor a little bit. I don’t want the avocado flavor to be big and in your face. I also added a hefty teaspoon of vanilla extract, and 2 tablespoons of milk. These also contain no eggs! With the honey, the batter was soft and thin enough, and by using cornstarch and whole wheat flour, we don’t need anything else to add chewiness. I used a combination of white and whole wheat flour. The first time I made these, I used all whole wheat flour, and the cookies were just a bit too dense and chewy. With the combination, the protein content is cut down, making the cookies softer.

hccookies4

A few notes on texture: Because there are no eggs nor white sugar in this recipe, there is no spreading. To prevent these cookies from being tall mounds of cookies, you do need to flaten these cookies a bit after you roll them. Example here:

hccookies2

With 3/4 C chocolate, 1 tsp vanilla, and 2 Tbs milk, you can hardly tell that these are anything but your average chocolate cookie full of butter and sugar. They’re sneakily healthy… which is honestly the best kind of healthy dessert. But because these cookies are so fudgy and dense, chilling the dough is MANDATORY. Chill for at least two hours before baking.

This is a fudgy, dense, cookie, perfect with a tall glass of milk.

hccookies6

Recipe:
Ingredients:

  • 1 small avocado
  • 3/4 C honey
  • 1/2 C Brown sugar, packed
  • 1 tsp vanilla extract
  • 2 c flour (1 C whole wheat; 1 C white)
  • 3/4 C chocolate powder
  • 1/2 tsp salt
  • 1/2 tsp baking soda
  • 1/2 tsp cornstarch
  • 2 Tbs milk
  • 1 and 1/2 C chocolate chips
  1. Slice and pit the avocado. Place into the bowl of a stand mixer with honey, sugar, and vanilla. Mix until combined.
  2. In a medium bowl, sift together flours, cocoa powder, salt, baking soda, and cornstarch. slowly mix into the wet ingredients.
  3. Add the chocolate chips.
  4. Let chill for 2-36 hours.
  5. roll into heaping tablespoon mounds. flatten slightly and press chocolate chips in top. Sprinkle with sea salt.
  6. Bake at 350˚F for 8-10 minutes. Let cool slightly on baking sheet for 5 minutes before transferring to a wire rack to cool.

Want more cookies to bake?

Try my tried and true recipe for chocolate chip cookies…

cccookies2

Or my S’mores cookies! 

s'morescookies2


May be linked to: Thursday’s Treasures,

S’mores Chocolate Chip Cookies

Summertime is almost (officially) upon us! Time for vacation, late nights, and camping trips. Well, for most people. I’m not a huge fan of camping, but I do enjoy a good s’more every now and then.  You don’t have to be sleeping under the stars to enjoy a s’more- you can just make them inside your oven. And with these cookies, you don’t have to deal with a messy sandwich to enjoy the taste of s’mores.

s'morescookies1

Now, don’t get me wrong. I do love the mess and taste of a traditional s’more- most of the time. But when I want a mess free, cookiefied experience, I reach for these cookies. Plus, these are much more portable than a normal s’more- you can take these everywhere when the craving for campfires and daydreams of stargazing hit. After all, summer vacation doesn’t really exist after high school/ college. Sadly. Unless you’re a teacher.

s'morescookies2

I took my mom’s famous chocolate chip cookies, and mixed in graham cereal, marshmallow bits, and of coarse, chocolate chip cookies. I also browned the butter for a nutty, deeper, taste. (And also because brown butter makes everything better!) These cookies were popular! I took them to a game night and they went fast. There were only 8 people at game night- and I took nearly 3 dozen cookies. You will be the most popular person in the room wherever you take these cookies, I promise.

s'morescookies3

Recipe:
Ingredients

  • 1 c (2 sticks) butter, browned and chilled.*
  • 1/2 c sugar
  • 1 c packed brown sugar
  • 1 tsp vanilla extract
  • 2 eggs
  • 2 1/4 c flour
  • 1 tsp baking powder
  • 1 tsp salt
  • 3/4 c crushed graham cereal (I used target store brand cinnamon toast crunch)
  • 1/2 c semi-sweet chocolate chips
  • 1/2 c marshmallow bits
  1. Beat butter, sugars, and vanilla on medium speed until combined. Add in the eggs and mix. 
  2. In a medium bowl, mix together flour, salt, and baking soda. Mix into wet ingredients.
  3. Add in the graham, chocolate chips, and marshmallow bits and stir in by hand.
  4. Chill the dough for at least 30 minutes.
  5. Preheat oven to 275˚ if using convect or 300˚ if using normal mode. Drop rounded tablespoons of dough onto cookie sheets and bake for 8-10 minutes, or until edges are slightly golden brown. Let the cookies sit for a few minutes so the centers can firm up, then transfer to a wire cooling wrack to finish cooling.

Photobucket

Soft Baked Peanut Butter Cookies

Let me tell you about these cookies.

They’re big.

pbcookie1

They’re soft.

pbcookie3

With just enough of a crunch

pbcookie2

They’re peanut butter-y.

pbcookie4

And they’re all around wonderful.

My mother loves Mrs. Fields a lot. It’s kind of ridiculous how much she loves her- one time in first grade she sent me to school dressed as her for “dress like a celebrity day.” No one knew who I was. That’s okay; I was just a little hipster six year-old.

Anyway. Because of that love, my mother has a Mrs. Fields cookbook that has served us well over the years- it even helped me make friends in 9th grade conceptual physics. (It was supposed to be “physics without the math.” It wasn’t any less confusing and I don’t remember anything in that class except that I got in trouble for reading, and it was the one year I had snack time in high school.)

Brian and I spent the day together on Saturday, and we made these cookies. Both Saturday and Sunday we could not stop eating these cookies! My mother doesn’t even like peanut butter, and she loves these cookies.

Adapted from Mrs. Fields Cookie Book

Ingredients:

  • 2 C all-purpose flour
  • 1/2 tsp baking soda
  • 1/4 tsp salt
  • 1 1/4 c brown sugar, firmly packed
  • 1 1/4 c white sugar
  • 1 c salted butter, softened
  • 2 large eggs
  • 1 1/2 c creamy peanut butter (or 1 16 oz jar)
  • 2 tsp vanilla extract
  1. In a medium bowl combine flour, soda, and salt. Mix well with a wire whisk and set aside.
  2. In a large bowl blend sugars with an electric mixer on medium speed. Add butter and mi to form a grainy paste. Add eggs, peanut butter and vanilla, and mix on medium speed until light and fluffy.
  3. gradually add the dry ingredients and mix at low speed until just mixed; being careful not to over- mix.
  4. Chill well; at least 30 minutes-2 hours.
  5. Preheat oven to 300 degrees, or 275 if using convect.
  6. Drop by rounded tablespoons onto a cookie sheet. With a wet fork gently press a crisscross pattern on the top. Bake for 18-22 minutes until cookies are slightly brown around the edges. They may look underdone in the middle; that is okay and is necessary in creating softer cookies. Let stand for a few minutes to firm up; then transfer to a wire rack for cooking.

These cookies are softest and peanut buttery-est on day two, but they’re wonderful even up to a week later!

Domestic Superhero Photobucket

Just Like Mom’s Chocolate Chip Cookies

cccookies1

My mother makes the best chocolate chip cookies ever, hands down. I know, I know, everyone says that about their mothers cookies.  But my mom’s cookies really are fantastic.

I’m not the only person who says so. My grandfather, her father-in-law, says so. Multiple teachers of mine in junior and senior high said so.  Everyone at my church said so. In fact, at bake sales for school and church, people would request her cookies.

I went to a private, K-12 school. My freshman year of high school we had our very first musical, and the woman in charge of refreshments at intermission was new to the school and had never had any of my mom’s cookies. My mom called her, volunteering to make cookies to sell, and the woman said “no, we already have plenty of cookies; you can make brownies though!” Well. At intermission on opening night, people kept coming up and asking specifically for my mother’s cookies by name. The next day mom get’s a call, asking her to make cookies for the remaining shows.

cccookies2

So when all is said and done, my mother does have the best cookies ever.  It’s proven by my tiny, 400 person school.

I do some things a little differently than my mother does- mostly because she likes her cookies crispier and crunchier than I like mine, so she doesn’t chill the dough or pull them out when they’re slightly under done and let them firm up on the stovetop like I do. If you do this right, they’ll taste just like raw cookie dough. No lie.

It’s similar to most basic cookie recipes: Butter, sugars, flour, vanilla, leavening agents, eggs, etc.  We like to double the amount of brown sugar to white sugar- this makes the cookies softer and more moist, due to the addition of molasses in the brown sugar.

Begin by creaming the sugars, butter, and vanilla in your stand mixer, then add the eggs.  Mix together the dry ingredients, and slowly stir them into the wet ingredients. After this you are done with the electric mixer, so make sure to scrape as much dough off of the paddle with a rubber spatula and a knife. Then, with the spatula, mix in the 1 1/2 c of chocolate chips. My mother likes to use 2 cups, but after doing some reading on other food blogs, I discovered that 1.5 c of add-ins was plenty, and having a little less will help bake the cookies thicker. I decreased the amount of chips, and it was still very, very chocolate-chipy.

IMG_0699

See? still plenty of chips.

Here’s the recipe:

(yields 2-3 dozen cookies)

Ingredients:

  • 2 Sticks (1 cup) butter
  • 1/2 c sugar
  • 1 c brown suger
  • 1 tsp vanilla extract
  • 2 eggs
  • 2 1/4 c flour
  • 1 tsp baking soda
  • 1 1/2 c chocolate chips

directions:

  1. mix butter, sugar, and vanilla until creamy. Add eggs, one at a time.
  2. in separate bowl, mix flour, baking soda, and salt.
  3. slowly mix in the flour mixture to wet ingredients, and blend until fully mixed.
  4. stir in chocolate chips
  5. let chill for at least 30 minutes.
  6. drop rounded teaspoon size balls onto a nonstick cookie sheet and bake at 275 on convect or 300 on non-convect until the edges are golden brown.
  7. pull out of oven and let sit for 3-5 minutes until cookies are firm, then transfer to a wire rack to finish cooling.

cookies will keep for 2-3 weeks in a jar or airtight container.